
-
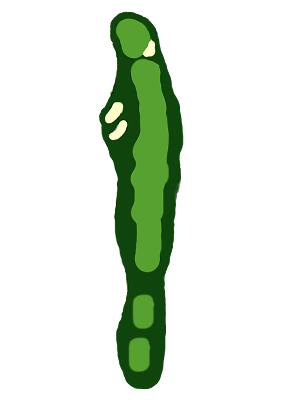
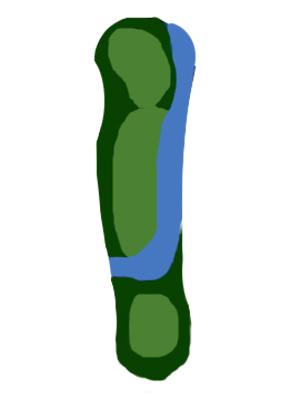
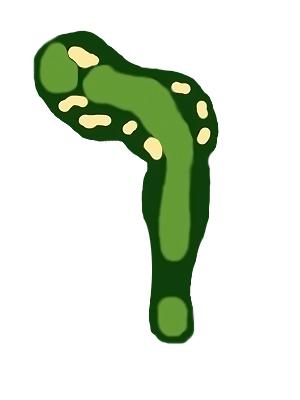
Par 5
Tee Yardage Handicap Black 514 7 Blue 492 7 White 431 7 Gold 421 1 Description
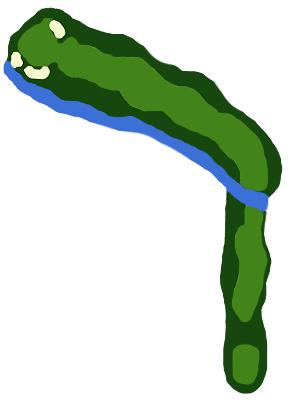
Hole #1 - A dogleg left par 5. Challenge the left side with a drive over the trees and you can set up a birdie or an easy par but too far left and you ™ll be out of bounds. The safe play is a 3 wood straight out and play it like a three shot par 5. A very tricky green is the biggest defense of this hole.
-
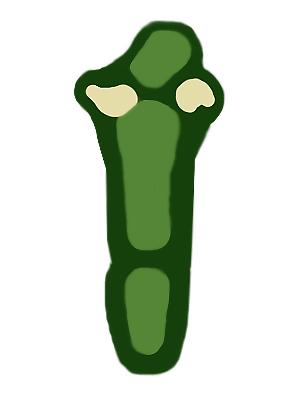
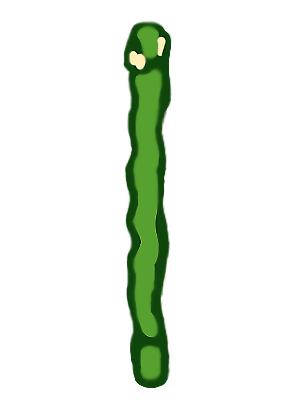
Par 3
Tee Yardage Handicap Black 192 13 Blue 185 13 White 171 13 Gold 160 15 Description
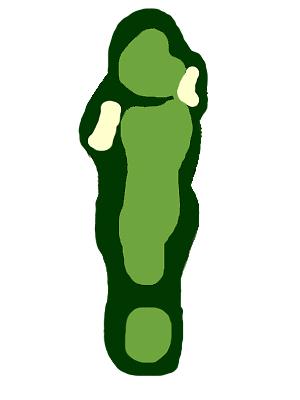
Hole #2 - A classic mid length par three. Avoid the bunkers on the front right and left of this long kidney shaped green. It might be three clubs difference from front to back. Par is a great score here.
-
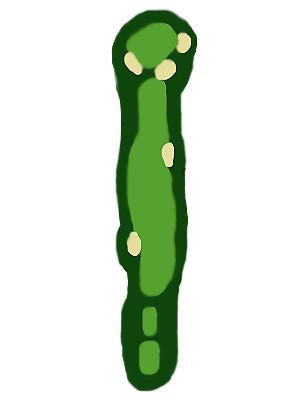
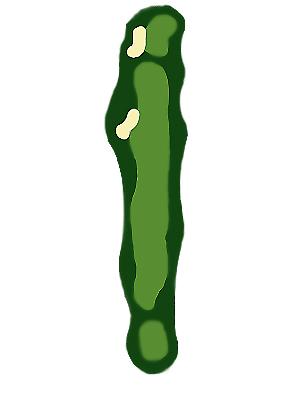
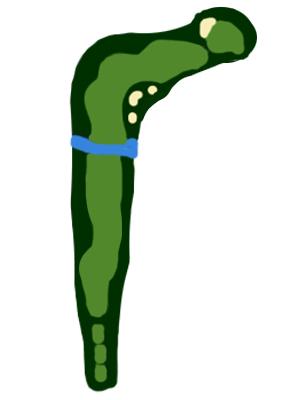
Par 4
Tee Yardage Handicap Black 450 1 Blue 421 1 White 315 1 Gold 310 7 Description
Hole #3 - The number one handicap hole and longest par four on the course plays even longer because its up hill all the way. A long straight drive can set up a mid to long iron second shot to a blind narrow green. Another very long green makes it difficult to hit it close on this one.
-
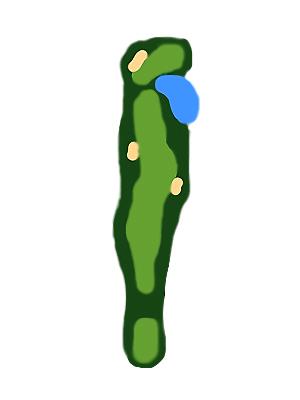
Par 5
Tee Yardage Handicap Black 545 3 Blue 510 3 White 497 3 Gold 443 3 Description
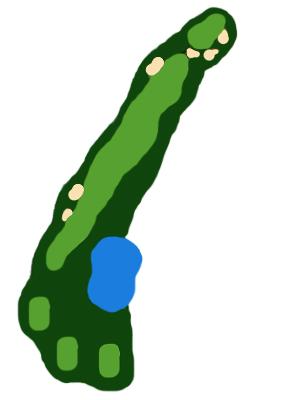
Hole #4 - A medium length par 5. Keep your drive left center to avoid the pond on the right. Long hitters can reach this one in two. Three shot players need to avoid the fairway bunker at 100 yards and stay to the left side for the best angle at the pin. A deep greenside bunker guards the front of this undulating green.
-
Par 4
Tee Yardage Handicap Black 429 5 Blue 395 5 White 382 5 Gold 335 5 Description
Hole #5 - A very solid par 4, this is another one of the really good holes to start the front nine. A right to left tee shot is preferred to maneuver around the two fairway bunkers on the left. A pond guards the right side of this green so be cautious with the back hole locations.
-

Par 4
Tee Yardage Handicap Black 426 11 Blue 383 11 White 365 11 Gold 307 11 Description
Hole #6 - A mid length par 4. One of the prettiest holes on the course, this one requires a very straight drive. Avoid the three greenside bunkers and be sure to choose the right club when approaching this two tiered green or two putting can be a challenge.
-
Par 3
Tee Yardage Handicap Black 146 17 Blue 135 17 White 123 17 Gold 110 17 Description
Hole #7 - This is the shortest hole on the course. Bunkers guard this green on all sides and if you fall asleep on this large sloping green you can three putt in a heartbeat.
-

Par 4
Tee Yardage Handicap Black 396 9 Blue 368 9 White 354 9 Gold 306 9 Description
Hole #8 - Another of the very tough par 4™s on the front side. Tee off with a driver or 3 wood to set up a mid to short iron into this green. Bunkers guard the left side on the approach but the real difficulty come with this sloping two tiered green. Club selection on your second shot to this uphill green will make all the difference in what you score on this one.
-
Par 4
Tee Yardage Handicap Black 330 15 Blue 312 15 White 281 15 Gold 254 13 Description
Hole #9 - A short par 4. Avoid the two fairway bunkers and you will have a very sort second shot. On your approach stay below the pin and birdie is possible but be careful as this green has a lot of slope from front to back.
-
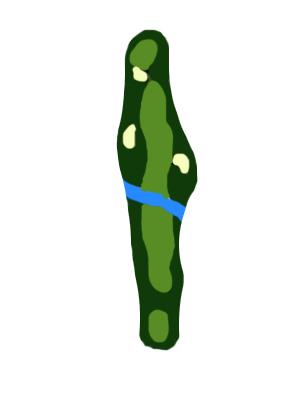
Par 4
Tee Yardage Handicap Black 371 8 Blue 342 8 White 318 8 Gold 286 6 Description
Hole #10 - This medium length par 4 requires an accurate tee shot to set up your approach, be careful as the OB sneaks up pretty fast on the right side. A slightly downhill second shot to this kidney shaped green needs to be judged correctly. A front pin placement can make this a birdie hole but a back left pin really requires great distance control. Get above this pin and your last putt might be your third one.
-
Par 3
Tee Yardage Handicap Black 170 16 Blue 154 16 White 141 16 Gold 120 16 Description
Hole #11 - A solid par three with plenty of obstacles to overcome. Water lines the entire right side of this hole and wraps around the back side of this green. Trees line the left side. The only place to hit this one for a decent score is on the green.
-
Par 5
Tee Yardage Handicap Black 485 12 Blue 471 12 White 425 12 Gold 420 4 Description
Hole #12 - An accurate tee shot on this short par 5 can lead to a mid to long iron approach. If you don't reach the green in two keep your second shot short of the green for the best chance at an up and down birdie or easy par. If you stray off the tee on your second shot it can lead to an easy bogey or higher.
-
Par 4
Tee Yardage Handicap Black 440 6 Blue 380 6 White 370 6 Gold 290 8 Description
Hole #13 - A very good uphill par 4, one of the best holes from the back tee. A right to left tee shot is ideal to this fairway that slopes from left to right. Club selection for your uphill second shot is critical to this very undulating green. Stay away from the front greenside bunker, and missing this green left can leave a difficult up and down.
-
Par 4
Tee Yardage Handicap Black 395 4 Blue 365 4 White 320 4 Gold 295 10 Description
Hole #14 - Moving this green back 60 yards and around the pond made this one of the difficult and appealing holes on the course. A little left to right tee ball will go a long way with the sloping fairway. The pond on the right is in play for almost every pin placement. This green has three tiers and might be the longest from front to back so hitting the right level can lead to a good score.
-
Par 4
Tee Yardage Handicap Black 339 18 Blue 331 18 White 313 18 Gold 305 14 Description
Hole #15 - Risk reward par 4. A big hitter can cut the corner and get right in front of this green. The safe play is 3 wood or rescue straight out leaving a 100 " 125 yard approach to this fairly flat but well guarded green. The key to this hole is to avoid any of the 8 bunkers that can come into play on your tee shot or approach.
-
Par 5
Tee Yardage Handicap Black 536 2 Blue 521 2 White 489 2 Gold 451 2 Description
Hole #16 - The one that most remember at the NGC, love it or hate it. This three shot par 5 needs to be played just like that. Hit something short of the creek that crosses the fairway at 275 to set up a placement second shot over the corner fairway bunkers. This will leave anywhere from 150 to 120 to this three tiered green. Trees over hang this difficult green and make the uphill third shot more demanding. Like many at the NGC this green has multiple levels which can cause putting issues. Make 5 here and your ahead of the game.
-

Par 5
Tee Yardage Handicap Black 192 14 Blue 168 14 White 148 14 Gold 129 18 Description
Hole #17 - A visual postcard for this medium length par 3. This hole may be the signature hole at the NGC. This hole is framed by tall pines, white bunker sand, and creek that wraps in front and around the left side of this hole. The tee shot plays down hill almost 50 feet so choose your club correctly. Bring the tee shot in from right to left and avoid the left greenside bunker for your best chance at a par.
-
Par 3
Tee Yardage Handicap Black 347 10 Blue 337 10 White 317 10 Gold 262 12 Description
Hole #18 - A short par 4 finishing hole. The tee shot is key to playing this hole well. Avoid the fairway bunkers on the right and the trees on the left and you will have a short shot into this green. The slightly uphill approach can fool the golfer into not taking enough club. This green has a bit of a blind approach and a lot of slope so it's tricky to tell if you™ve hit it close. It's a chance to finish with a birdie or a solid par.